
Learning Objectives:
Students will demonstrate proficiency with Adobe Illustrator shape modification tools
Students will show understanding of figure/ground relationships
Notes:
Notan
Japanese design concept that focuses on the harmonious arrangement of light and dark in a composition.
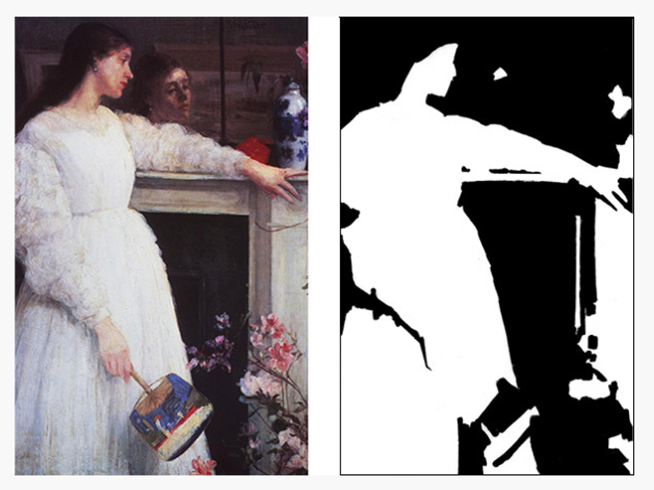
Figures on Ground
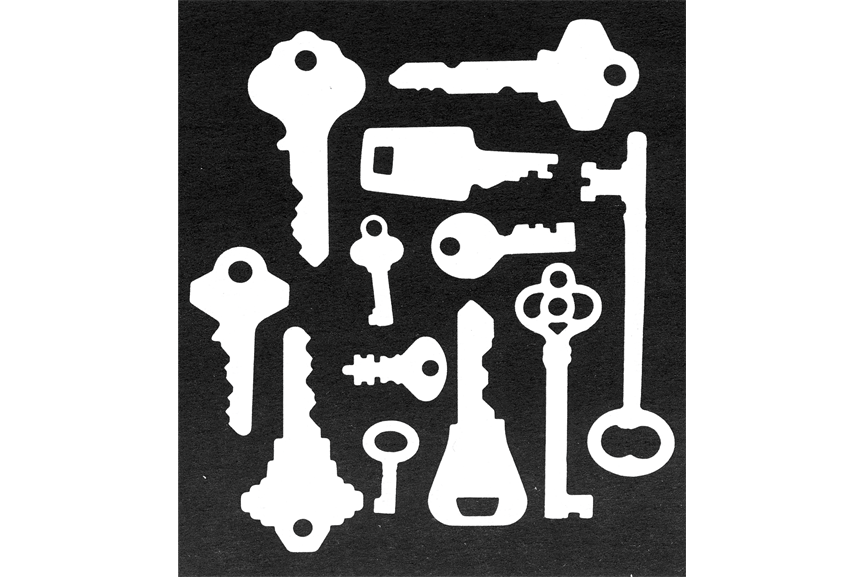
This illustration is an example of white figures on a black ground.
The white key figures have the most visual weight in the composition and are not interacting with the ground.
Maintaining a 50/50 visual balance between figure and ground is key to your Notan design.
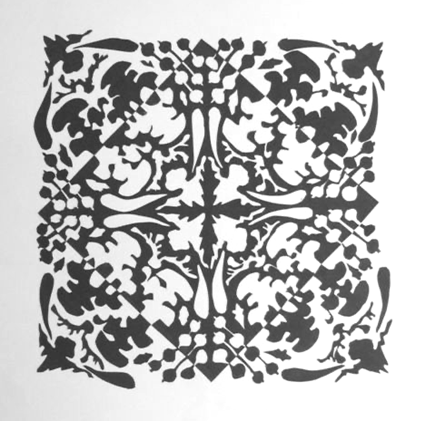
Notan Square Expansion

In the Notan Square Expansion exercise, the goal is to maintain a “dichotomy of attention,” or a 50/50 balance between the figures and the ground in the design.
This balance is created by cutting shapes from the inside of the the square and reflecting them along the axis of and outside edge. Of the square.
Your design can be symmetrical or asymmetrical.
If you don’t add or take anything away, your result will always be a 50/50 balance.
Notan Design Rule 1:

You can only use black and white.
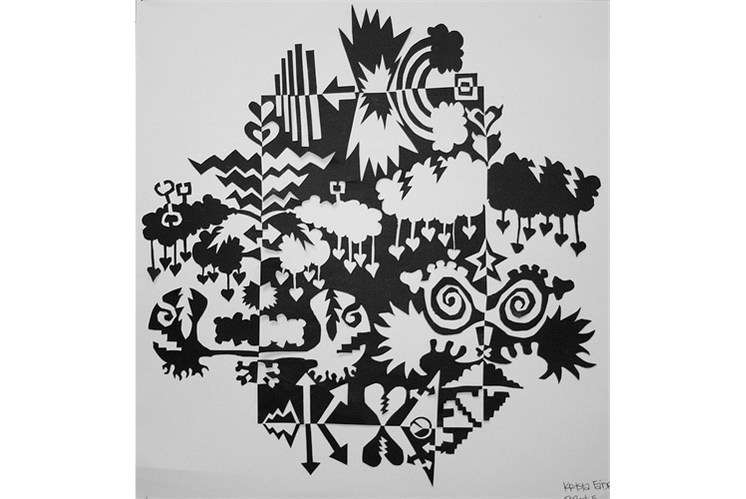
Notan Design Rule 2:

You must have a theme. This student’s theme was hockey.
Notan Design Rule 3:
No cut shapes can be deleted or added. Look carefully at this example and notice how every shape is reflected across the design. Your goal is to “destroy” the square and create a “dichotomy of attention” between the white and black shapes.
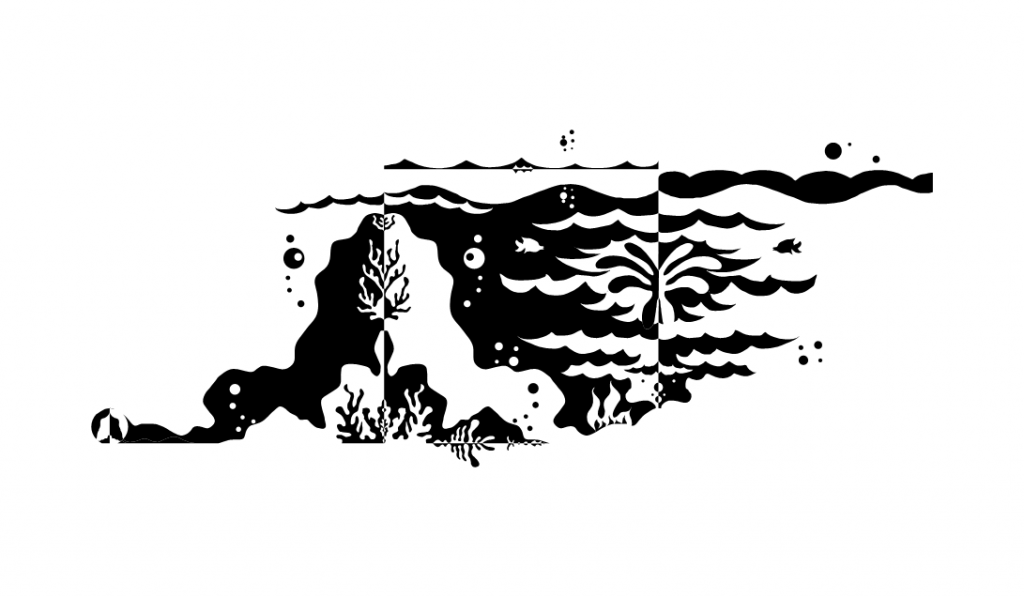
Notan Design Rule 4:

Every shape that is cut from the interior must be reflected equidistantly across the axis line of the nearest edge from which it was cut.
Notan Design Rule 5:
You must explore 2 levels of expansion outward and/or back inward to increase the complexity and interest of your design. Varying scales of shapes will help you achieve this.
Composition study from MitchAlbala.com
Read more about Notan in composition at artist,
Mitchell Alba’s website.
Getting started
• Complete Exercise 1 BEFORE starting Project 1 to learn the tools.
• Complete the required sketches before beginning in Illustrator
• Carefully review the project sheet to make sure you fulfill all requirements and read over important project tips.
• Contact Erin at Erin.Anfinson@mtsu.edu with any questions.
Project:
Use the skills you learned in Exercise 1 to create a complex square expansion composition that illustrates the Japanese dark-light principle of design, Notan. Through the composition process you will improve your skills with the shape modification tools in Adobe Illustrator. Review the Exercise 1 demo video as needed to complete this project!
The primary rule is to reflect each and every shape you cut on the opposite side of its axis along the square edge. You cannot add or delete any extra shapes to the composition.
Step 1: Project research, sketches, and document set up
Review the Project 1 Presentation on D2L.
Select a theme for Notan design. Something simple—outer space, the ocean, flowers, sports, tools, etc…
Complete 3 different black and white drawings in your sketchbook to generate ideas for possible themed shapes and the overall expanded square layout of your design. Submit jpegs of your sketches to the D2L Dropbox with the project by on due date.
On your computer, create a new Project 1 folder on your computer. Label this folder LastName_FirstName Project 1. (example: Anfinson_Erin Project 1)
Create a new, 300ppi, 11” x 11” document in Illustrator and draw a 6”x6” black filled square in the center of the page (no stroke).
Click Create and immediately save your file in the Project 1 folder as LastName_FirstName Project 1.ai (Example: Anfinson_Erin Project 1.ai).
Step 2: Develop your Digital Notan design from your sketches
Use the pencil, shape and/or pen tools to create united shapes inside the edges of the black square. Use the Divide pathfinder tool and the Reflect tool to reflect your cut-out shapes along the axis line of the edge of your square.
Continue cutting, reflecting, and expanding your square with themed shapes a minimum of 2 levels outward and/or inward until you achieve a “dichotomy of attention” between the black and white positive and negative spaces.
TIP: The goal is to “destroy” the dominant shape square. Start with large, bold cutouts first, medium-sized shapes 2nd, and smaller detailed, descriptive cutouts last in the expansions.
Step 3: Wrap up your design with grouping and a custom border
When you are finished with your design, select all of your shapes and Group the together.
Center your design in the center of your artboard
Look at the overall size in the Transform window (Window > Transform) and write this size down.
Next, Resize your artboard to proportionately fit your design with a 1 1/2” border on all sides.
Example: if the final grouped design is 8”x4”, add 3” to each side and your artboard should be 11”x7”
Project Requirements (Assessment Criteria)
Noticeable theme is present in the design
Minimum of 2 levels of shape expansion beyond the original square
Proficiency with shape and pathfinding tools is evident in the complexity of the drawn and cut shapes.
Assignment “Rules” were followed. Any and all cut shapes are reflected across their access lines. No shapes are added or deleted.
Use of black color to fill all shapes (No visible strokes)
Achievement of a balance of “dichotomy of attention” between the black and white space in the design
The original square is successfully destroyed
Final design is grouped and centered on the artboard
Final design is correctly framed with a 1 ½” in border on all four sides
Exporting and submitting your exercise:
When you have finished Project 1, go to File > Save As…
Next, select Adobe PDF from the format options.
In the next window, make sure “Preserve Illustrator Editing Capabilities” is checked!
Click Save PDF. Be sure you file is labeled correctly! LastName_FirstName Project 1.pdf (Example: Anfinson_Erin Project 1.pdf)
Don’t forget to also upload a Jpeg of your sketches!
Submit the PDF of your completed Project 1 file in the class D2L Dropbox