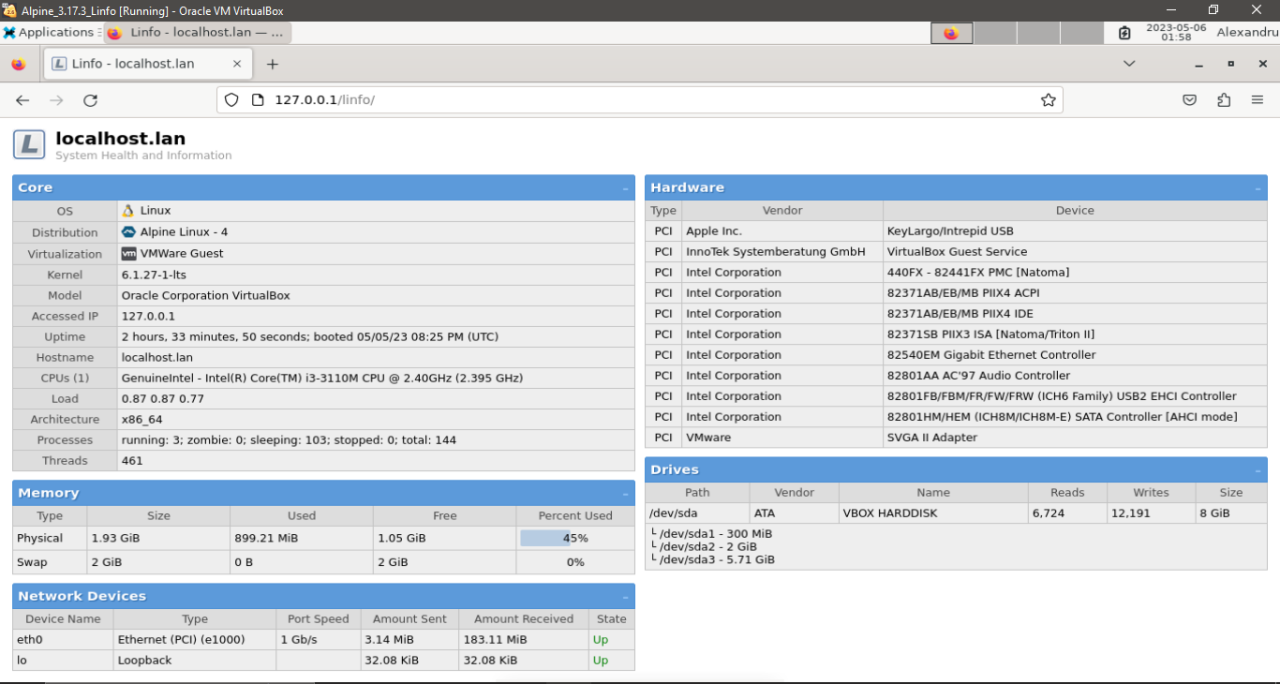
Setting up the Linfo software for server monitoring purposes on our Alpine Linux virtual machine
Running the Linfo software for server monitoring on our Alpine Linux Virtual machine.

Setting up the Linfo software for server monitoring purposes on our Alpine Linux virtual machine

Welcome back to another tutorial from our Alpine Linux explorations tutorial series.

This time we are going to run the Linfo software on our Alpine Linux virtual machine for server monitoring purposes.

 We need to complete several steps to get it working correctly.

1. We need to power on our Alpine Linux virtual machine from the Oracle Virtual Box Manager.

Power on the Alpine Linux Virtual Machine

2. Once our Alpine Linux virtual machine execution environment has fully booted we are ready to begin the process – system ready.

Login to our Alpine Linux Virtual machine

3. We need to open the Linux Terminal.

Open the Linux Terminal

4. We need to switch to the root user to run the necessary commands to install the Linfo software correctly. 

Use the root account

5. We first need to update our Alpine Linux virtual machine execution environment. First, run the command ‘apk update’.

Run the command apk update

6. We then need to run the command ‘apk upgrade’.

Run the command apk upgrade

7. Now the Alpine Linux virtual machine execution environment is fully updated. 

Alpine Linux virtual machine execution environment is now updated
The Alpine Linux virtual machine execution environment is now updated

8. We need to run the command ‘reboot’.

Now we run the command reboot

9. Now we need to log back in, open the Linux Terminal again and switch to the root account.

We need to install the necessary packages to get our full functionality enabled.

First, we run the Linux terminal command “apk search Linfo”.

We need to install the necessary packages to get our full functionality enabled

We can see that the package Linfo is not available in the main repositories. 

10. Let’s install the required web server infrastructure first, including our Lighttpd web server and PHP support packages. Then we can get our Linfo software using wget or git.

11. We also need to install the tool git.

We move on to install the git tool

12. Now we can prepare our Lighttpd web server.

We now need to get a webserver running to run the php for the Linfo package
We now need to get a web server running to run the PHP for the Linfo package

13. Our Lighttpd server is now active and running.

We now have our necessary webserver running
We now have our necessary web server running

14. We can add a homepage to be able to test our web server functionality. 

Now we create the homepage to test our Lighttpd server functionality

15. We can now confirm that our Lighttpd web server is running correctly.

We can now confirm that we have webserver functionality
We can now confirm that we have web server functionality

16. Our next step is to add the necessary PHP support.

Now we need to install PHP support for our webserver

17. We also need to make some configuration changes to our Lighttpd web server.

We need to configure our Lighttpd webserver

18. We need to enable the option to include mod_fastcgi.conf.

We must enable the line include mod_fastcgi.conf
We must enable the line to include mod_fastcgi.conf

19. We now need to restart our Lighttpd web server to enable the new configuration changes that we have just made. 

Now we must restart our Lighttpd webserver to enable the configuration changes we just made
Now we must restart our Lighttpd webserver to enable the configuration changes we just made.

20. Now we are ready to install our Linfo software using the tools wget and SourceForge.

Now we can prepare our Alpine Linux execution environment to run Linfo and we can install it from sourceforge using wget
Now we can prepare our Alpine Linux execution environment to run Linfo and we can install it from Sourceforge using wget

21. We need to open up the tar archive file, copy over the configuration file included, create a symlink, and change the directory permissions.

It is done
It is done.
We need to open up the tar archive file copy over the configuration file included and create a symlink and change the directory permissions
We need to open up the tar archive file, copy over the configuration file included, create a symlink, and change the directory permissions.

22. Finally we can simply restart our Lighttpd server to fully enable all of these new changes. 

Finally we simply restart our Lighttpd webserver
Finally, we simply restart our Lighttpd webserver.

23. We have victory! It works.

We have victory!
We have victory!

We can successfully use the Linfo software for server monitoring purposes.

We have done it!
We have done it!

24. Now we can run the poweroff command to shutdown our Alpine Linux Virtual Machine.

Now we can run the poweroff command to shutdown our Alpine Linux Virtual Machine
Now we can run the poweroff command to shutdown our Alpine Linux Virtual Machine.

I enjoyed this exercise a great deal. See you in the next one! #linux

To view or add a comment, sign in

Insights from the community

Others also viewed

Explore topics